Subscribe:

Labels

Friday, March 16, 2012

My Favourite Breakfast: Steel-Cut Oats

I would hazard a guess that I eat this at least four times a week.  I absolutely love steel-cut oats, and I know that at some point, I had a recipe for this, but I've altered it and changed it so much, and I don't have the original source anymore, so I feel confident enough to call this recipe one of my own.  

For those of you out there who haven't been exposed to anything but Quaker quick oats, here's what Wikipedia has to say about steel-cut oats:
Steel-cut oats are whole grain groats (the inner portion of the oat kernel) which have been cut into pieces. They are commonly used in Scotland and Ireland to make porridge, whereas rolled oats are used in England, other English-speaking countries, and Scandinavia. They are sometimes named after the grade of cut, e.g. pinhead oats; steel-cut oats from Ireland are sometimes called Irish oats.    
Steel-cut oats are golden in color. They come in different grades depending on the size of the pieces: pinhead (the largest), coarse, medium and fine. 
Steel-cut oats take longer to cook than instant or rolled oats due to their minimal processing, typically 15–30 minutes (though much less if pre-soaked). The flavor of the cooked oats is described as being nuttier than other types of oats, and they are also chewier.[1] 

Anyhow, in case you're wondering how it is that I can eat porridge (of all things!) so many times every week, here's why.  Steel-cut oats are such a versatile oat.  There's so many ways you can prepare porridge with them, and I rarely make it the same way twice in a week.  They also store extremely well in the fridge, and I will often make two or three days worth of porridge in one go, store it in a little container, and toss it in the fridge.  The con, (and the only one I can think of!) is that it takes about 30 minutes to an hour to make them.  Which is why I prepare many days worth at a time.

My Basic Steel-Cut-Oat Recipe:

*disclaimer: I very rarely measure, especially for this recipe.  So if you can't deal with measurements like 'a little handful' - 'lots' - and 'large dashes' ...this isn't the recipe for you.
  • 1 part steel-cut oats
  • a spoon of butter, coconut oil, or olive oil
  • 3 parts water
  • 1 part non-dairy milk (I suppose you could use real milk, but why?  It's gross.  I typically use soy or almond)
  • 1 capful pure vanilla extract, or part of a vanilla bean sliced lengthwise
  • a large dash of cinnamon
  • miscellaneous items *
  1. Put pot on the stovetop, heat medium.  Throw in your spoon of butter, or coconut oil, or olive oil.  I've never tried it with olive oil, but I imagine it'd be okay. 
  2. Toss in your one part steel cut oats, turn the heat down a little bit, and stir constantly.  That's key: if you don't stir, you will burn them, not brown them.  Stir constantly until the oats are a little bit brown on the outsides, and they start to smell a little nutty.  
  3. Add 3 parts water.  That means, if you added 1/2 cup oats, then add 1 1/2 cups of water.  Got it?
  4. Add vanilla extract or vanilla bean.  On low-medium, simmer for about twenty minutes, or until it's looking less like liquid and more like porridge.
  5. Add one part non-dairy milk.  This morning, I used unsweetened almond milk. (if you added vanilla bean, scrape out the seeds into the pot and throw the pod away)  
  6. Add large dash of cinnamon.  Add miscellaneous items. Continue simmering until it looks like porridge again.  
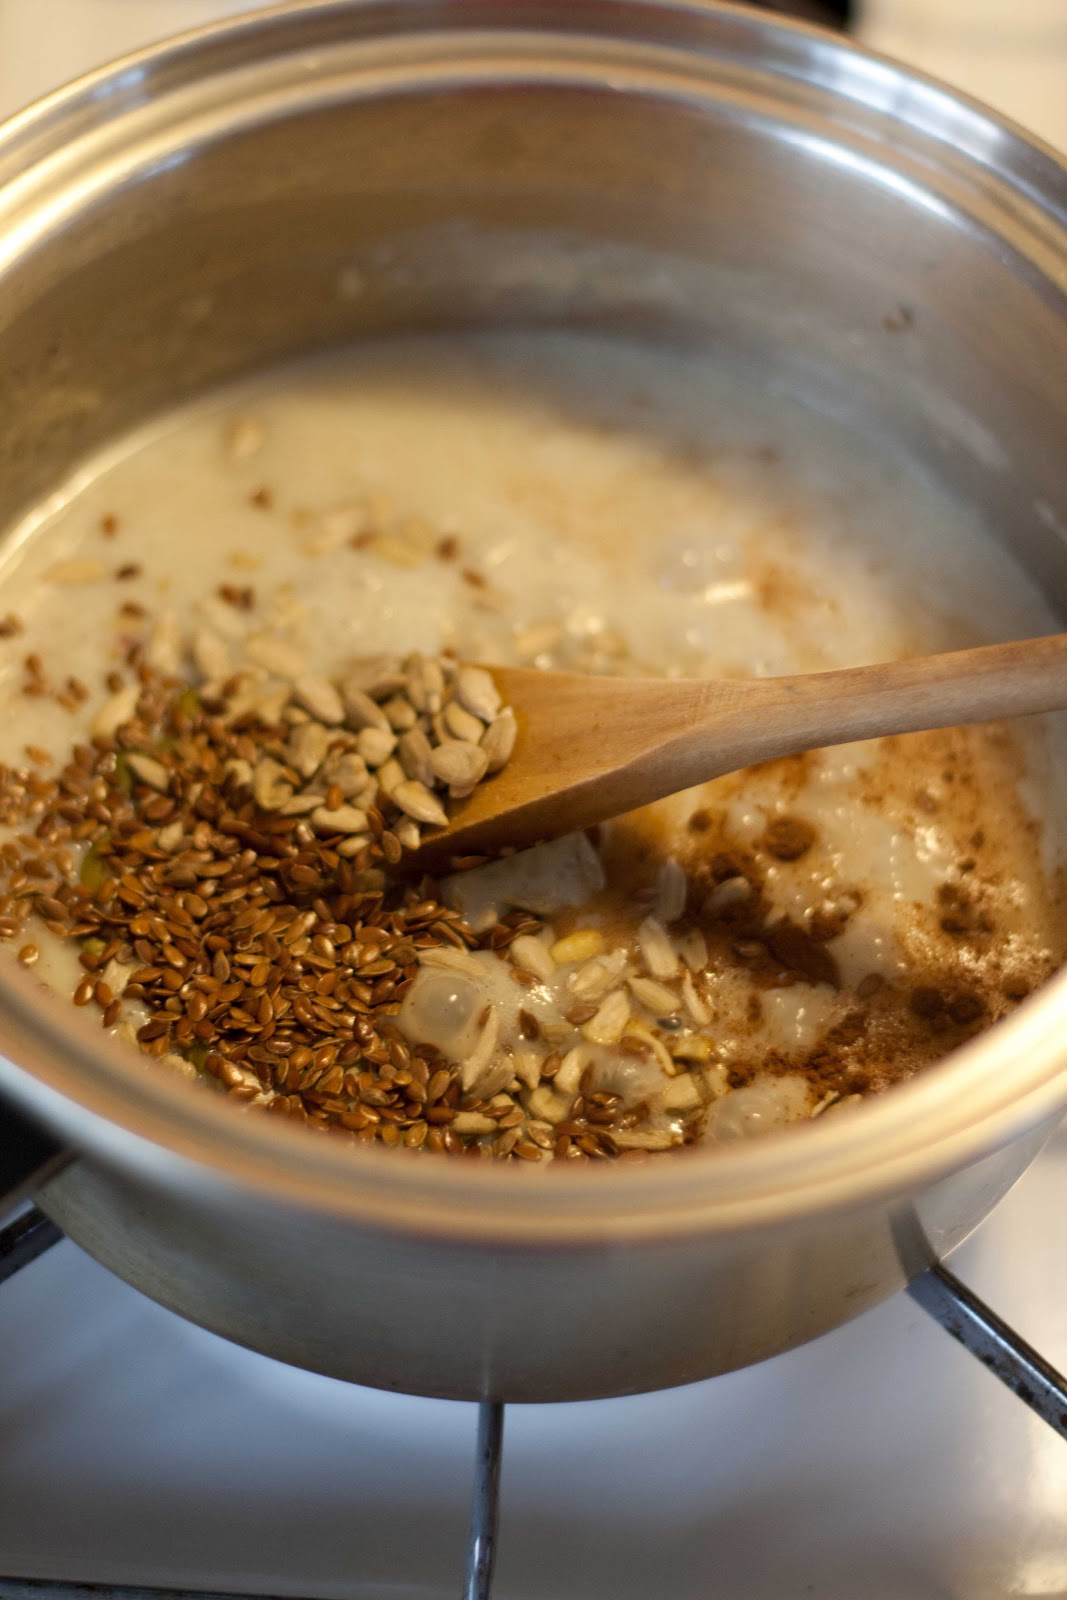
*Miscellaneous items: I switch this up depending on how hungry I am, how I feel, and what I have in the fridge/cupboards.  For this morning's recipe, when I added the milk and cinnamon, I also added a handful of pumpkin seeds, sunflower seeds, and about a spoon of whole flax.  While it was cooking, I chopped up half a banana, four strawberries, some pecans, and two medjool dates.  Once it was all in the bowl, I added a spoon of almond butter, and a few hemp seeds.


You can do things how you want, but I always add seeds (except hemp or chia) to the pot while it's simmering to soften them up, and the same goes for dried fruits (raisins, dried dates, cranberries, dried pears, etc).  Everything else goes in the bowl. 

Some things you could add to this are: 
- blueberries, raspberries, strawberries, pears, apples, bananas, or any other fruit you can think of.
- dried fruits
- nuts, seeds of your choice (I typically go for pumpkin seeds, sunflower, flax, hemp, chia seeds, almonds, or pecans.  I'm not a fan of macademia, brazil nuts, or walnuts)
- nut butters (I used almond butter this morning, but good ol' PB is tasty too!)
- honey, maple syrup, agave nectar 
- I've never tried adding cocoa, but that could be tasty too.


And that's basically it.  Make the basic porridge (plus seeds/nuts/dried fruits) ...and that stores in the fridge really well.  Then when you want some, cut up a big ol' batch of fruit and nuts, throw them into a bowl, put porridge over them, and then microwave it for a bit until it's hot.  Add honey or maple syrup if you need a sweetener, or some almond butter if you want it a bit creamier, and voíla! 

1/2 cup of oats typically lasts me three days.  

Wednesday, March 14, 2012

Lentil and Chickpea Coconut Milk Curry


Lentil and Chick Pea Curry with Coconut Milk adapted from source
  • 3 tbsp oil (I used olive)
  • 1 onion, chopped
  • 3 cloves garlic, minced
  • 2 tbsp fresh ginger, minced or grated
  • 2 medium carrots, diced
  • 1 thai chili, minced with seeds intact
  • 1/2 tsp cayenne pepper
  • lots of ground cumin
  • lots of ground coriander
  • lots of garam masala
  • dash of salt
  • 1 796mL can of crushed tomatoes
  • 1 400mL can of coconut milk *
  • 2 cups whole green lentils, rinsed and picked through
  • 1 540mL can of cooked chickpeas, rinsed 
  • a bunch of chopped cauliflower
  • 1 floret of broccoli, chopped
  • some fresh green beans, chopped
  • 1 cup frozen peas
  • plain yogurt (optional)

  1. In a frying pan, heat oil over medium high heat.  
  2. Add the onion and cook until soft, a minute or two.  Add the garlic and ginger, carrots, chili, spices and salt.  Stir well and cook for a couple of minutes.  
  3. Transfer to slow cooker and stir in the crushed tomatoes, coconut milk, lentils, chickpeas.  Set on high.
  4. Cook for about two hours, thereabouts, wandering into the kitchen periodically to stir things up a bit.
  5. Add broccoli, cauliflower, peas, and green beans.  Stir some more.  
  6. If curry is too thick, thin it with some water (I had to).
  7. Scoop into bowls and top with plain yogurt (optional).  
  8. Can be served with rice, or roti, or naan.  I choose to eat mine with mashed sweet potato and a tablespoon of yogurt, only because I was denied this opportunity in India, as they like their yogurt full-fat, and that's got too much lactose in it for my poor, lactose-intolerant stomach.  My liberal tablespoon of yogurt is 90% lactose free!

*Note: I was dumb when I was reading the original recipe, and I added TWO cans of coconut milk.  The original recipe does indeed call for that, but I think perhaps the poster was referring to two small cans of coconut milk.  She recommends 2 cans (540mL) of coconut milk.  I added 800mL of coconut milk, and that's waaaay too coconutty.  To compensate, I added a can of tomato paste, and reseasoned it with a veritable ton of garam masala and coriander.  It helped.  The original recipe also calls for indian curry paste (the Patak's stuff), but it contains sugar as one of its ingredients, so I couldn't use it.  I relied instead on the skills I learned cooking in India.  Instead of curry paste, I added a thai chili, more ginger, garam masala, and just upped the quantities of the other spices.  It seems to have worked.  

Lesson learned: don't be as dumb as me.  It's still tasty.  I just would have done it differently (ie: the recipe I've posted for you) a second time around.  


Salt and Vinegar Roasted Chickpeas

I might possibly live off of chickpeas.  I eat them in salads, as snacks, in curries, in hummus, and I've even puréed them and put them in pasta sauce.  Seriously, chickpeas are the shit.


Salt and Vinegar Roasted Chickpeas adapted from source
  • 2 cups canned chickpeas
  • 3-4 cups white vinegar
  • 1 tsp Coarse sea salt
  • 2 tsp extra virgin olive oil
  1. Line a baking sheet with tin foil or parchment paper. 
  2. Take chickpeas and vinegar and place in a medium sized pot. Add a dash of sea salt. 
  3. Bring to a boil and then remove from heat. Let sit in pot for 30 minutes. 
  4. Preheat oven to 425F. 
  5. Carefully drain chickpeas. 
  6. Place on lined baking sheet and drizzle with olive oil and sea salt. Massage with fingers until fully coated. 
  7. Roast for 45 minutes, flipping once half way through. 
  8. Keep a careful eye on them after 35 minutes of cooking to ensure they don’t burn. The goal here is crispy and golden chickpeas, not black!
They're pretty tasty.  Though, next time, I'm going to use more salt.  A lifetime of being stingy with salt means that mine are more vinegary-tasting and less salty-tasting.  They're still delicious though!

Endurance Crackers - a homemade, gluten-free cracker!

Right.  Next recipe.

A little while ago, when I was still getting cravings, and frantically trying to figure out what I could snack on post-gym that wasn't my typical granola bar (yes, even the healthy ones have sugar in them!) ...I stumbled (quite literally, I StumbleUpon'd it) across this recipe for healthy, gluten-free crackers.  Crackers?  From scratch?  What an odd concept, I thought.
So naturally, I had to make them.

They are vegan, gluten-free, soy-free, nut-free, sugar-free, and oil-free...and freaking delicious. 


Endurance Crackers adapted from source

Yield: 22 large crackers
  • 1/2 cup chia seeds
  • 1/2 cup sunflower seeds
  • 1/2 cup pumpkin seeds
  • 1/2 cup sesame seeds
  • a rather large handful of flax seeds
  • a smattering of poppy seeds
  • 1 cup water
  • 1 large garlic clove, finely grated
  • 1 tsp grated sweet onion
  • some sea salt
  • approx 1 tsp. of rosemary and cracked pepper, ground in the mortar/pestle 

  1. Preheat the oven to 325F and line a large baking sheet with parchment paper.
  2.  In a large bowl, mix the seeds together. In a small bowl, mix the water, grated garlic, and grated onion. Whisk well. Pour the water mixture onto the seeds and stir until thick and combined. Season with salt and herbs. 
  3. Spread the mixture onto the prepared baking sheet with the back of a spoon until it’s less than 1/4 inch thick. Not to worry if a couple parts become too thin, you can just patch them up.
  4. Bake at 325F for 30 minutes. Remove from oven, slice into crackers, carefully flip onto other side with a spatula. Bake for another 30 minutes, watching closely after about 25 minutes. The bottoms will be lightly golden in colour. Allow to cool completely on the pan. Store in a container or plastic baggy.

Nutritional Info: (per cracker, makes 22 large crackers): 77 kcals, 6 grams fat, 4 grams carbs, 0 grams sugar, 3 grams fibre, 3 gram protein.

Raw Vegan Brownies

Okay, well...

Blog#2.  I've been tossing this idea around for a while now, and a few friends have been hounding me to start one, so hey...I'm unemployed, I might as well start a food blog, right?  I make very little in the way of promises that I'll keep this up, or that you'll even want to eat the kinds of foods I like to cook, but I like cooking, and I like photography, and I like taking photos of my cooking.  

It just means I'm going to start using my dSLR instead of my iPhone.  

I really do love cooking.  I cook all the time.  When you're lactose intolerant, vegetarian, a bit of a health freak, and currently not consuming sugar and wheat, you kinda have to like cooking.  

Or frozen vegetables.  Take your pick. 

Anyhow, here's the first of a few recipes I'm going to streamline right off the bat.  I'll be making each recipe a post in its own, as that makes looking recipes up later in the recipe index far easier.  I recently started listening to this podcast called 'The Rawitarian', and the episode I listened to was about how to cook raw vegan brownies.  And I'll have you know, I listened to this podcast at the gym!

It's sugar-free, gluten-free, oil-free, no-bake, and vegan (duh!).  


Raw Vegan Brownies adapted from source
  • 1 cup pecans 
  • 1 cup medjool dates
  • 5 tablespoons dark cocoa powder
  • 4 tablespoons shredded unsweetened coconut
  • 1 tablespoon honey
  • 1/4 teaspoon sea salt
  1. Place pecans alone in your food processor and process until the pecans become small and crumbly.
  2. Pit dates, and then add them to the raw brownie recipe and process again until the mixture sticks together and the dates are well processed.
  3. Add the remaining ingredients to this raw brownie recipe and process again until the mixture turns a lovely dark chocolatey brown. Stop processing before it gets too buttery. (There should still be air between the small bits so that you will be able to press them down into your brownie pan.)
  4. Dump the mixture into a brownie dish or small cake pan and press down firmly using your clean hands.
  5. Refrigerate this raw brownie recipe for a couple of hours. You do not have to refrigerate it, but it is much easier to slice when chilled. 
  6. Store this raw brownie recipe in the refrigerator. (I actually keep mine cut into tiny one-inch squares in a bag in the freezer)


*Note: If you're a die-hard vegan, you'll notice there's honey in this recipe, and that's not strict vegan.  You're probably enraged.  It was in the original recipe, posted by a raw vegan site, and I happen to like honey.  I also happen to not be vegan.  That's how life works sometimes, non?